If you're reading this, then you've probably just installed some new coping stones and are looking for a guide on how to point them. Well, you've come to the right place! In this blog post, we'll be discussing two methods of pointing - using traditional mortar mix and using flexible mastic. We'll provide a step-by-step guide on how to carry out each method, so you can choose the one that's best for you. So, let's get started!
Pointing Coping Stones Using A Traditional Mortar Mix
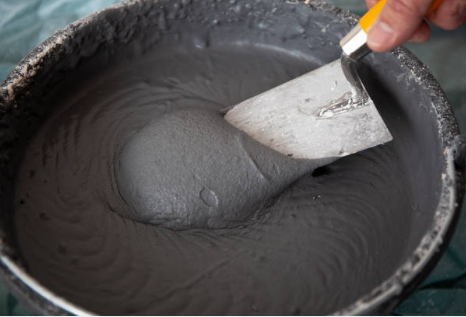
The first method we'll be discussing is using a traditional mortar mix. It's often the method that most people opt for - the main reason being during the installation of the copings themselves, the mortar mix will already be made up. So it's often easier to simply use the mortar and just put it into place. We have written a full guide on the right mortar mix for coping stones. So have a good read of that first if you have questions about this part of the process.
If you are opting for this method, using the following steps will get you there:
Step 1. Firstly, take your trowel and fill it with the same mortar mix you have used for installing the copings. Be careful not to overload your trowel as you will be placing the mortar into quite small gaps.
Step 2. Place the mortar mix very carefully into the gaps between the copings and smooth it out evenly with the trowel as best you can. It's easier to use the side of the trowel to tap the joints down. Use as much as you need to fill the gaps - don't worry if it overflows slightly as we will smooth it down later.
Step 3. Once you're happy with the coverage, take a pointing iron and press the mortar down until it sits just below the line of the top of the coping. Your mortar should be smooth and level at this point and sit nicely in line with the copings themselves.
If you've used a bit too much mortar, some may begin to overflow from the gaps. It's no big deal, just get rid of it with your trowel and clean the area with a damp sponge before it sets.
Step 4. Finally, take one final look at the area and use a damp sponge to remove any excess mortar as the stains are much more difficult to remove at a later date.
Pointing Coping Stones Using Flexible Mastic
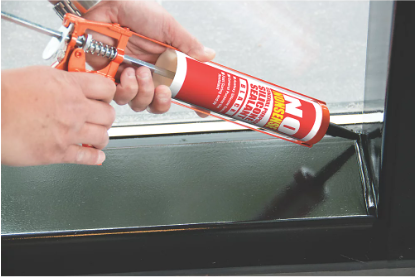
The second method we'll be discussing is using flexible mastic. This is a more modern method that's becoming increasingly popular due to its ease of use. Rather than having to mix up a traditional mortar mix, you can buy a ready-made product that is ready to use right away. The mastic can be fed directly into the gap from a tube.
Step 1. To start, take your tube of mastic and cut the tip off at a 45-degree angle. This will help you to get a nice, even flow of mastic when you start to fill the gaps. Attach the tube to a mastic gun.
Step 2. Next, hold the tube upright and squeeze the trigger of the mastic gun gently, so that the mastic starts to come out. Be careful not to squeeze too hard as you don't want the mastic to come out too quickly.
Step 3. Fill the gaps between the copings with the mastic, moving the tube along as you go. Again, take care not to overfill the gaps as this will make it more difficult to get a nice, even finish. It works very similarly to sealant a bathroom edge or similar.
Step 4. Once you're happy with the coverage, use a pointing iron or similar tool to press the mastic down until it's level with the top of the coping stones.
Step 5. Use a damp sponge to remove any excess mastic and then leave it to set.
And there you have it!
Which Pointing Method Is Right For Pointing Your Coping Stones?
There are a few things you need to consider when deciding which pointing method is right for you.
Time Is Money - Overall you may just choose to go with a mortar mix as you have it there ready! Many do and it's an option that works with any choice of coping. So you may not really have a decision to make. However, there are other factors you can consider:
The type of stone - Softer stones with a textured edge are easier to deal with when using mortar. A mortar mix is much easier to compact into the small nooks and crannies of a textured edge sandstone. Rather than messing around with mastic and trying to squish it into the gap and making a mess. A mortar may be the better option.
Harder stones such as Indian limestone or granite, or stones with a clean-cut edge may work better with a mastic. Mastic is very easy to use to fill straight-edged gaps and is ready to use out of the tube - no need to mix anything.
The colour of the coping - if you are style conscious and are looking for gaps/joints that match the colour of your coping, then a mastic will be the answer. Mastic is available in several different colours and is especially good for matching up with our Black Copings Stones for example.
.jpg)
The size of the joints - The second thing you need to consider is the size of the gaps between your coping stones. We would advise the joints are at least 10mm, but if they are very small, then the mastic mix is often the best option as it's easier to control and get a nice, even finish.
In Conclusion - Pointing your copings should be nice & easy
It's a much easier job than installing them. So if you have successfully managed to install the copings already, you should have no trouble with this. Hopefully one of the above methods jumps out to you and you're able to get cracking right away.
And that's it! We hope this guide has been helpful and you now feel confident enough to point your own coping stones. If you have any questions, please don't hesitate to get in touch. We're always happy to help.