Introduction - Installing Coping Stones
Coping stones are one of Primethorpe’s most popular products - and for good reason. They look great, perform brilliantly, and extend the lifespan of your walls and garden features.
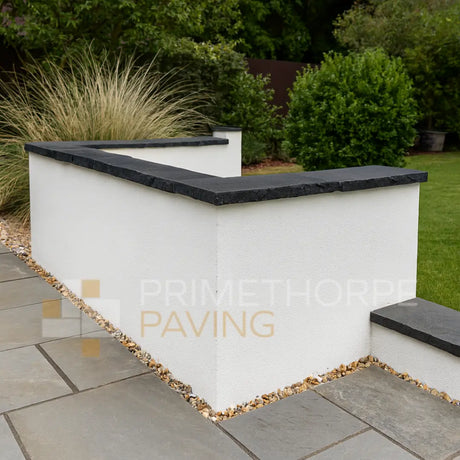
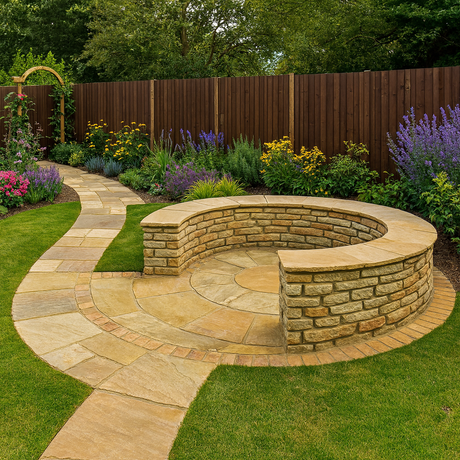
Exposed walls are constantly hit by the elements - rain, frost, wind, and sun - and over time, that exposure wears them down. Coping stones act as protective caps, shielding the structure beneath while adding a stylish finishing touch. Whether you call them copings, coping stones, or even pier caps (when used on top of pillars rather than walls), the purpose is the same: to keep your wall looking its best and standing strong for years to come.
And the good news? Installing coping stones is absolutely achievable as a DIY project. So, if your wall is built and you’re ready to give it the finishing touch it deserves, this guide will walk you through everything you need to know - step by step.
Step 1: Plan & Prepare Your Wall & Copings
Before you start, grab a tape measure and figure out how many coping stones you’ll need.
- Length: Most Primethorpe coping stones are 600 mm long, so simply divide the total wall length by 600 mm to work out your quantity.
- Width: This is where it matters most. Choose a coping that’s 20–30 mm wider on each side than your wall to create an overhang. This ensures rainwater drips away from the wall face rather than soaking into it.
- Drip grooves: Our bullnose coping stones include built-in drip grooves underneath. These grooves break surface tension, stopping rain from curling underneath the coping and damaging the wall below.
Make sure to order all copings from the same batch to maintain colour consistency, and allow for a few extras in case of breakage or cutting errors.
Tools you’ll need:
Trowel, mortar mix (4:1 sand to cement), mixing bucket, spirit level, rubber mallet, tape measure, sponge, and brush.
How many coping stones do I need?
Step 2: Prepare the Surface of Your Wall
Before laying anything, get the top of the wall ready.
- Clean thoroughly. Remove loose debris, dust, or old mortar.
- Check for level. The smoother and more even the top of the wall, the easier the install will be. Minor dips can be levelled out later with the mortar bed.
- Dampen the surface. Lightly hose or sponge it down - a damp base helps the mortar stick better and cures more evenly.
- Fix: For small garden walls aim for ~150 mm depth; go deeper for taller/heavier walls.
- Keep trench width ~300 mm to support the wall and any coping overhang.
Under-digging leads to settlement and cracking later.
- Fix: Compact in layers using a wacker plate (or tamper for small runs) until firm and level.
- Uneven or spongy bases will telegraph through to the finished courses.
- Fix: Pour 100–150 mm of concrete over compacted hardcore; screed level and allow to cure.
- For taller walls, allow a longer cure window before building.
- Fix: Brush off dust/debris and lightly dampen the base so mortar bonds and cures evenly.
- A dry, dusty surface weakens adhesion and accelerates moisture draw from mortar.
- Fix: Use ~4:1 sand:cement. Aim for a firm, workable mix that holds shape—not runny.
- Excess water weakens the bed and increases staining risk on natural stone.
- Fix: Build corners/piers first, then run a tight string line each course.
- Check with a spirit level frequently to keep lines straight and even.
- Fix: Choose copings ~20–30 mm wider per side than the wall for a protective overhang.
- Ensure drip grooves underneath are clear so water sheds away from the wall face.
- Fix: Add ~10% for cuts, colour matching, and breakages—especially with natural stone.
- Ordering from the same batch helps keep colour consistent across the run.
- Fix: Avoid heavy rain/frost. If unavoidable, tent off the area and protect fresh mortar.
- Allow adequate cure time before loading or finishing.
Step 3: Mix the Mortar for Your Copings
For most installs, use a 4:1 sand-to-cement mix. Add just enough water so the mix is workable but firm - it should clump together easily, almost like forming a snowball.
Step 4: Lay the Coping Stones
Now for the fun part.
- Lay a mortar bed about 20–30 mm thick along a 1m section of wall at a time.
- Place the coping stone onto the mortar bed and tap it gently into position using a rubber mallet.
- Check the level across and along the wall. Adjust as needed by tapping lightly.
- Ensure consistent overhang on both sides (20–30 mm).
- If using bullnose copings, check that the drip grooves are visible underneath and not blocked by mortar.
Continue along the wall, maintaining a 10 mm gap between each coping stone for jointing later.
Tip: Work in small sections so your mortar doesn’t dry out before you place each coping.

Step 5: Jointing & Finishing
Once all copings are in place, it’s time to fill the joints.
- Use the same mortar mix you used for bedding. (Jointing compounds used for paving aren’t ideal here - you don’t want drainage through these joints.)
- Press the mortar firmly into each 10 mm joint with your trowel.
- Tool and smooth the joints neatly for a professional look and stronger bond.
Clean As You Go
Mortar stains can set quickly - especially on darker coping stones. Wipe away any excess mortar immediately with a damp sponge as you work. Waiting until the end can leave permanent marks that are difficult to remove later.
Step 6: Curing & Aftercare
Your wall looks finished - now it just needs time to set.
- Curing time: Leave the wall for at least 7 days before sitting, leaning, or placing any weight on it.
- Weather watch: If possible, plan your installation during a dry week. Heavy rain won’t destroy the work, but avoiding it will help the mortar cure more evenly.
- Regular maintenance: Check joints every few months. If you see cracks, mix a small batch of mortar and re-point.
- Cleaning: Occasional brushing and rinsing prevent algae or moss from settling on the surface.
A little maintenance goes a long way - with proper care, your coping stones will protect your wall for decades.
Aftercare Checklist
A little maintenance goes a long way—follow these essentials for a long-lasting finish.
-
7-day cure time Avoid sitting, leaning, or placing weight on fresh copings for at least a week.
-
Weather watch Aim for a dry spell. If rain hits, protect fresh joints so they cure evenly.
-
Inspect & re-point Check joints every few months; re-point any cracks to keep water out.
-
Keep it clean Brush and rinse occasionally to prevent algae or moss buildup.
Tip: If you used bullnose copings, ensure the underside drip grooves remain free of mortar so water sheds away from the wall face.
Final Thoughts
Coping stones have evolved far beyond their old concrete predecessors. At Primethorpe Paving, we’ve developed a wide range of natural stone and porcelain copings that don’t just protect your walls - they elevate your whole space.
From timeless sandstone to sleek modern porcelain, you’ll find a style that complements your garden perfectly. Whether your goal is protection, contrast, or pure curb appeal, our copings will make your wall look finished, refined, and built to last.
Ready to Finish Your Wall in Style?
Protect your wall and elevate its look with our premium range of natural stone and porcelain coping stones. Or complete the look with matching pier caps for a perfectly polished design.


