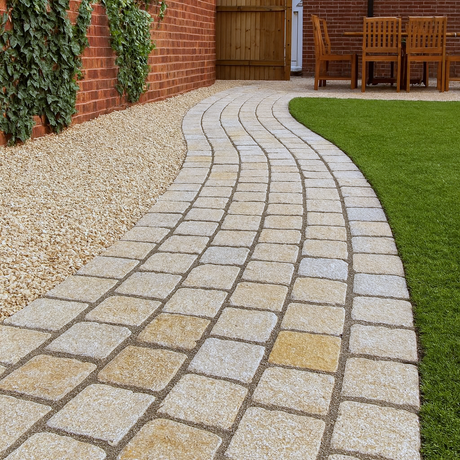
Thinking about using cobbles for your next garden project? Great choice. Cobbles — also called setts in the trade — are versatile natural stone blocks that work brilliantly as patio edging, decorative borders, and even full surfaces.
The best part? Most DIYers can lay cobbles in a single weekend. If you can mix mortar and use a spirit level, you’ve got the skills to get it done.
At Primethorpe, we tend to call them cobbles, but you might also hear “setts,” “cobble setts,” or even “set squares.” Whatever the name, we’re talking about the same thing: strong, natural stone blocks that look great and last for years.

Step 1: Plan Your Layout
Every good project starts with a plan.
- Sketch your design – decide where you want cobbles to go: edging, a border, or a decorative line.
- Mark the area – use a string line for accuracy (best for straight lines) or spray paint for curves.
- Get your tools ready – shovel, rake, mallet, spirit level, and sand/cement mix.
- Mix ratio – we recommend 4:1 sand to cement for strength, or 6:1 if you’d like more drainage.
- Order a little extra – cobbles are hand-quarried and can vary slightly in thickness. Having 10% more covers you for cuts and natural variation.
Need Inspiration First?
Take a look at our full Cobbles & Setts range before you start planning your project.
Browse Cobbles & SettsStep 2: Prepare the Base For Your Cobbles
The base is what keeps everything solid. How deep you go depends on the project:
- Patio edging & borders – excavate to around 100 mm.
- Driveways – excavate at least 200 mm. This needs to support vehicle traffic, so if you’re tackling a driveway, we recommend hiring a professional.
Once excavated:
- Fill the depth with MOT Type 1 hardcore.
- Compact it with a wacker plate (or a manual tamper for smaller edging projects).
- Aim for at least 50 mm of compacted hardcore with another 50 mm working depth for borders.
For borders and edging, a solid mortar bed alone may be enough for small DIY projects. For driveways, though, a properly compacted sub-base is non-negotiable.

Step 3 - Lay The Cobbles
And the fun part! There are 5 simple things to follow when laying cobbles
Mix your mortar
- Use 4:1 sand:cement for strength
- Or 6:1 for more drainage
Work in small sections
Spread mortar about 1 metre at a time.
Place & bed each cobble
- Set onto mortar bed
- Tap firmly with rubber mallet
Check levels often
Use a spirit level to keep lines straight and even.
Maintain a 10 mm joint
- Larger gaps weaken the structure
- Smaller gaps risk cracking in freeze–thaw
Pro Tip: Think of cobbles as mini bricks—lay carefully, keep them level, and the structure will last for decades.
Step 4: Jointing & Finishing
Once the cobbles are in place, fill the gaps to lock everything together. Here's a handy comparison table if you are unsure which option might be best for you:
| Option | Key Features |
|---|---|
| Jointing compound (best for DIY) |
|
| Sand & cement mortar (traditional) |
|

Step 5 - Curing & Aftercare
Now if you want your new work of art to stand the test of time, it's important to know your job is never done! There a few things you can do once or twice a year that will ensure your project will last as long as you do!
Curing:
- Mortar joints: Allow at least 7 days before foot traffic and 2 weeks before vehicles.
- Jointing compounds: Normally set in 24 hours, but give the mortar bed beneath plenty of time to cure.
Aftercare:
Once installed, cobbles are super low-maintenance. Just:
- Sweep regularly to prevent dirt build-up.
- Spray a weed killer every few months as a preventative measure.
- If joints crack, simply top up with a jointing compound repair kit — it’s a quick afternoon job.
Pro tip: Choose a jointing compound if you want easy future maintenance. It makes repairs and touch-ups a breeze.
Bring Your Project to Life
Cobbles are one of the easiest ways to finish a patio or define a space in your garden. With the right prep, they’re a simple DIY project that can be done in a weekend — and once they’re in, they’ll last for years with minimal upkeep.


